Sometimes, when sending out mass email campaigns, you need to include large files like presentations, price lists, or promotional materials. The most obvious solution is to attach the content directly to the email. But that’s not always the best option. Here, we’ll explain why using attachments can be problematic and how to send files of any size in your email campaigns using links to cloud storage, all while tracking download statistics.
Table of Contents
Why You Shouldn’t Send Large Files as Attachments
Attachments increase email size, reducing deliverability and impacting inbox placement.
When sending large files as attachments, it’s crucial to consider that recipients may use different email services with varying requirements. For example, some corporate email systems are very cautious about emails with attachments and may block them entirely. This directly impacts bounce rates and degrades delivery quality.
Large files slow down send times and recipient download speeds.
Recipients with slow internet connections might not even wait for your email to load. This is why email marketing services often limit the maximum size of attached files, for instance, to 4 MB.
Email clients frequently block or flag emails with attachments as suspicious, especially if the file size exceeds standard limits.
You can’t track who specifically opened your attachment or viewed its content.
The Right Way to Send Large Files via Email
Given the limitations of sending large files as attachments, we propose a more effective and convenient solution: upload the file to cloud storage and add a download link directly into your email.
This approach offers several key advantages:
- No file size limitations.
- Your email size remains minimal, positively impacting email deliverability.
- You can modify the file at any time after the campaign has been sent, or even restrict access to it.
- You can track who clicked the link and showed interest in your file through link analytics.
Step-by-Step Guide: How to Embed a Cloud File Link in Your Email
First, upload your file to a cloud storage service. Popular options include:
Let’s look at how to do this using Google Drive as an example.
Step 1: Upload Your File to Google Drive
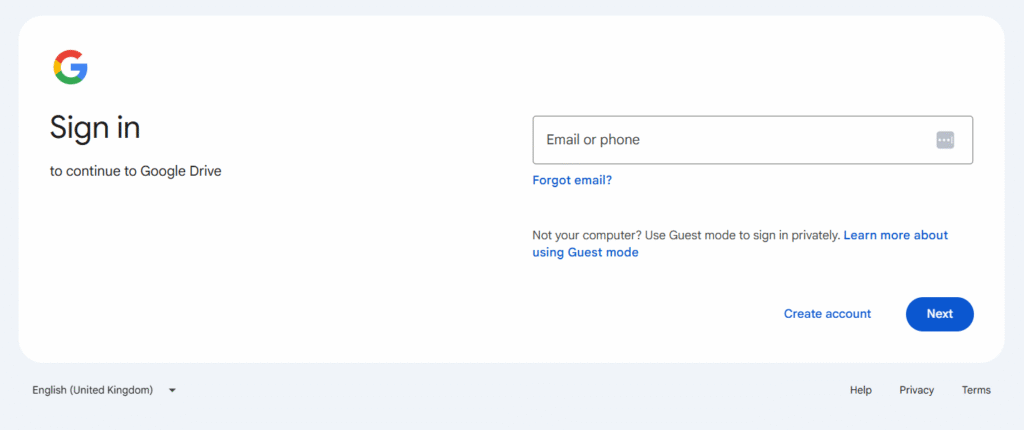
Sign in to Google Drive. If you already have a Google account, sign in. If not, you’ll need to create one.
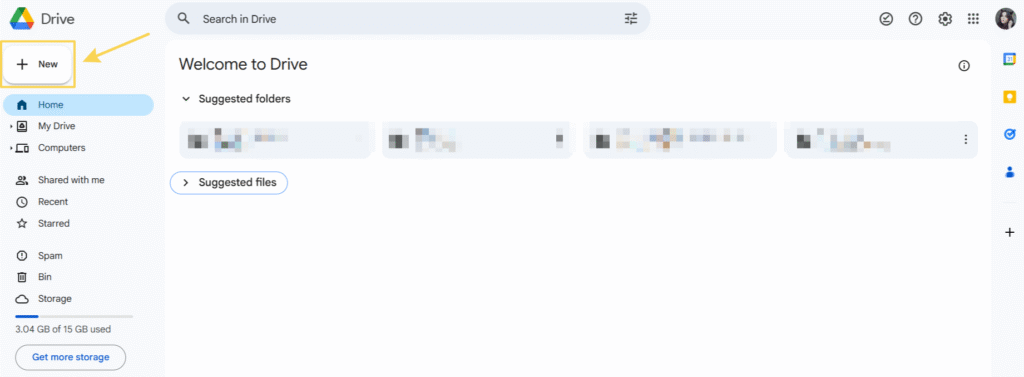
Upload the file. Once logged in, click on “+ New” in the top left corner, then select “File upload”. Choose the file you want to send in your email campaign.
Once the file is uploaded, it will appear in your Google Drive.

Step 2: Generate a Shareable Link and Set Permissions
Now you need to create a shareable link for your file.
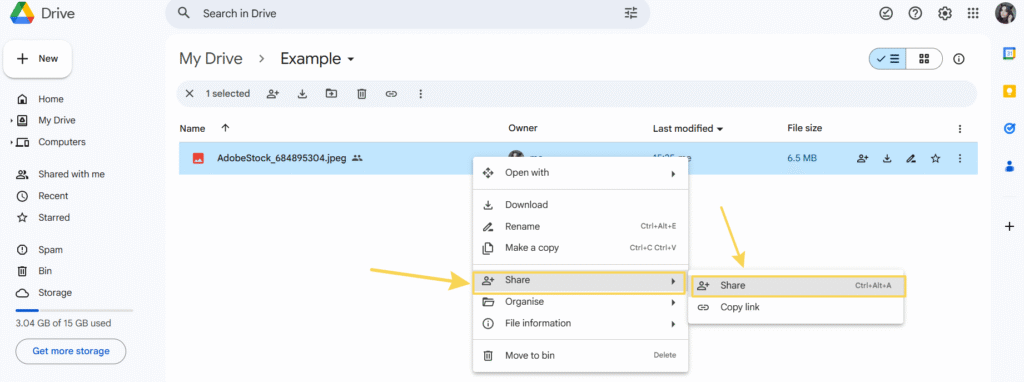
Right-click on the uploaded file in Google Drive.
Select “Share”, then “Share“ or Ctrl+Alt+A.
In the pop-up window, ensure the permission is set to “Anyone with the link” (if you want public access). From the dropdown menu in the “General access” section, you can choose “Viewer,” “Commenter,” or “Editor” depending on what you want recipients to do. For downloads, “Viewer” is usually sufficient.

Click “Copy link”.

You’ve now copied the link to your file. You can paste this link into your email.
Step 3: Add the Link to Your Email
Create your email in your email marketing service.
You can turn any word or phrase in your text into a clickable link. Highlight the desired text (e.g., “Download our Presentation,” “View Price List”).
In the floating text editor menu, click the “Insert/Edit link” button (it looks like a chain link icon).

In the pop-up window, paste the copied Google Drive link into the “URL” field and click “Ok”.

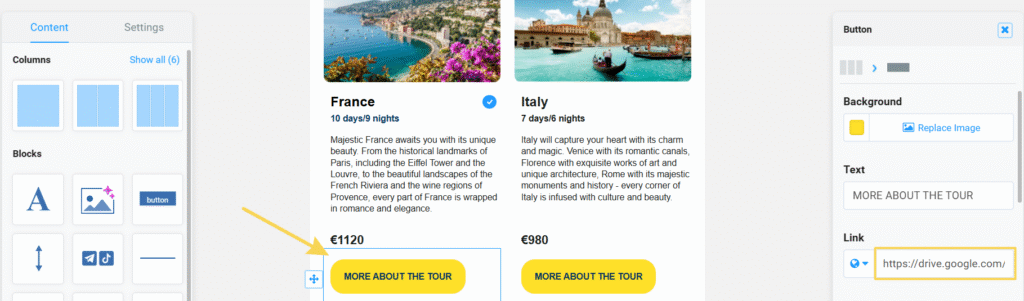
Alternatively, add the link as a button:
Many email editors allow you to add a button. Look for a “Button” element in your editor’s left-hand block and drag it into your email. In the right-hand properties panel, you can customize the button’s color, text (e.g., “Download Now”), and crucially, paste your Google Drive link into the “Link” section. You can also adjust the button’s size, font, and border radius.
How to Track File Downloads
Thanks to click tracking features in email marketing platforms, you can easily gauge interest in your file after sending the campaign:
- Go to the “Campaigns” or “Mailings” section in your email marketing service’s dashboard.
- Open the statistics for the relevant campaign and navigate to the “Click Map” or “Links” section.
- See which recipients clicked the link and showed interest in your material. This provides detailed insight into audience engagement.
Additionally, most cloud storage services (like Google Drive) offer basic statistics on file views and downloads for publicly shared files.
In Summary: 3 Simple Steps to Include Large Files in Your Campaigns:
- Upload your file to a cloud storage service.
- Generate a shareable download link and embed it in your email.
- Send your campaign and analyze recipient interest in the file.
Now you can effortlessly send large files in your campaigns without worrying about attachment size limits, and effectively monitor campaign performance using your email analytics tools.