The plugin is designed to export email addresses and user data from your WordPress site to the NiceSender email marketing platform. The integration is configured through downloading and installing the plugin using the instructions below.
With this plugin, you will be able to:
- Export users data from your WordPress site to the NiceSender.com email marketing platform. The plugin uploads email addresses, first names, last names and nicknames of all registered users.
- The plugin will automatically create any missing parameters. If the required parameters are missing in NiceSender, the plugin will automatically add them.
- Select mailing lists. You can select the mailing list in NiceSender to which users will be exported.
- Support for large amounts of data. The export will be split into several packages to correctly handle large amounts of data.
- Manage addresses with a simple interface. Easy setup and further use through the WordPress admin panel.
Table of Contents:
Tutorial on how to install the plugin
Step 1: Download the plugin
1. Download the integration plugin file from the link.
2. Make sure your site is running on the current version of WordPress and the plugin is compatible with it.
Step 2: Install the plugin through the WordPress admin panel
1. Go to the admin panel of your WordPress site at http://your-site.com/wp-admin/ (replace your-site.com with your site address).
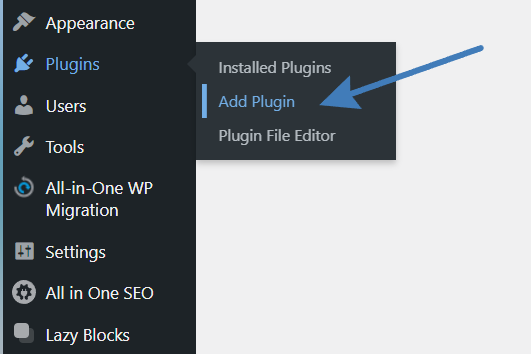
2. From the menu on the left, select “Plugins” and click “Add Plugin”.
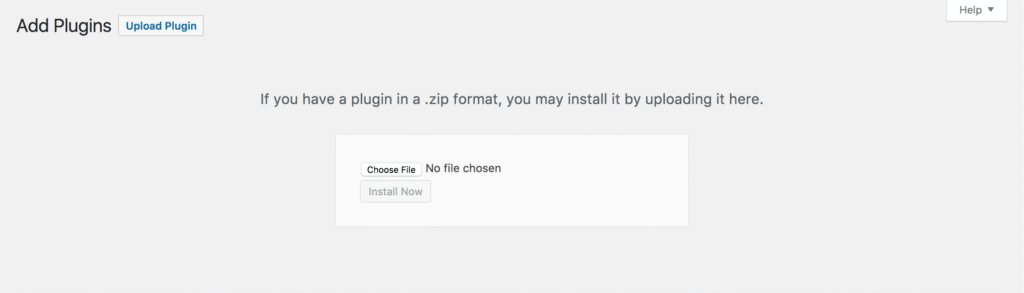
3. On the page that opens, click “Upload Plugin” at the top of the page.

4. Click the “Choose File” button, locate and select the plugin’s ZIP archive file on your computer.
5. After selecting the file, click the “Install Now” button.
6. Wait for the installation to complete. After that, click the “Activate plugin” button.
Step 3: Customize the plugin
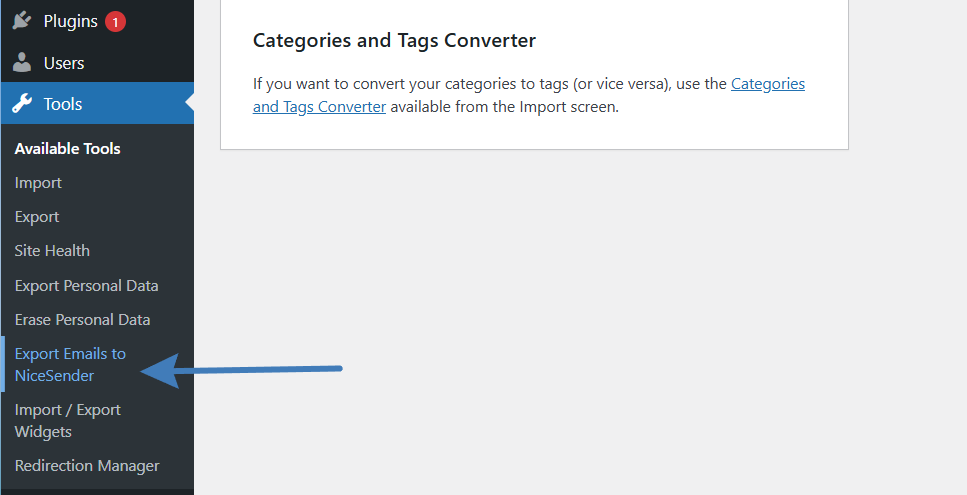
After activating the plugin, you will see a new menu item “Tools” in your WordPress admin panel. Go to the Tools section and select “Export Emails to NiceSender”. Here, you will be able to customize the plugin to work with your NiceSender account.
Getting API key in NiceSender
1. Log in to your account at NiceSender.com.
2. Go to “Automation” -> “API and SMTP”.
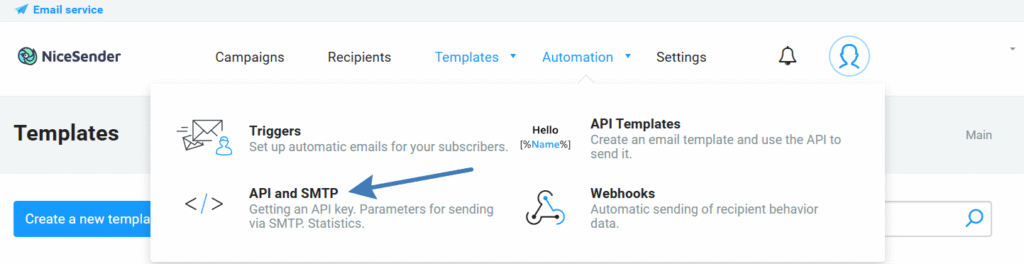
3. Generate a new API key or copy an existing one.
Enter API key on WordPress and select a group
1. In the “NiceSender API Key” field: paste your API key.
Below the field, you will see a hint: “You can obtain your API key in your NiceSender.com account under “Automation => API and SMTP“.
2. Click the “Save Settings” button to save the entered API key and the selected list.
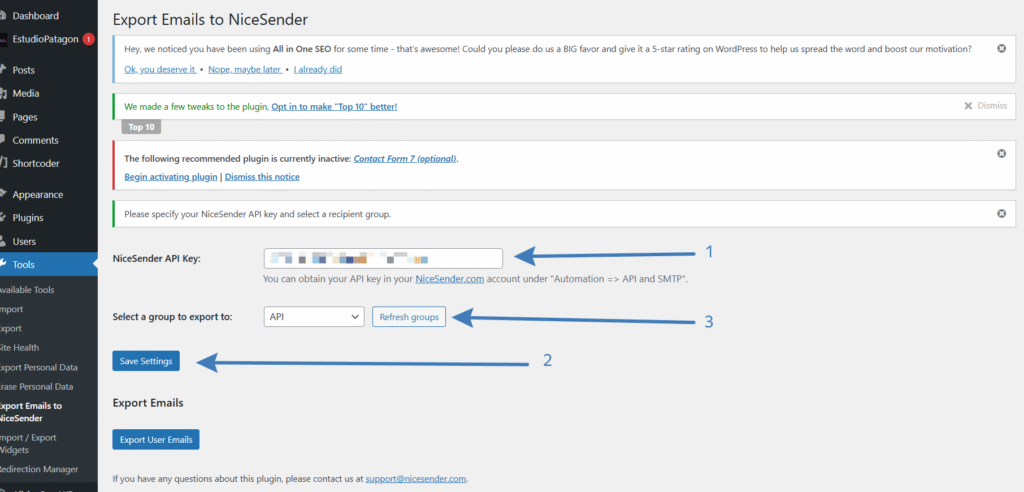
3. Click the “Refresh groups” button next to the drop-down list of groups. This will download an up-to-date list of your mailing lists from NiceSender.
4. In the “Select a group to export to” drop-down: select the mailing list you want to export users to. If you don’t have the list you want, create it in your NiceSender account and update the group list again.
Step 4: Export Users to NiceSender
1. After selecting a group, go to the “Export Emails” section of the plugin page.
2. Click “Export User Emails” to start the process. The plugin will automatically create missing parameters (like name or nickname) if they are missing in NiceSender.
3. The export process will be displayed as progress. You will see a message about the result of the operation:
1. Success: “Export completed successfully. Total exported users: [number].”
2. Error: If there are any errors, they will be displayed in the message.
The email addresses of your customers are now uploaded to NiceSender, and you can use them to send email campaigns.
If you have any questions about how the plugin works, you can contact NiceSender support by writing to support@nicesender.com.