In modern marketing, a whole team often works on email campaign strategy and implementation: marketers, content managers, analysts, as well as external specialists like copywriters and designers. Each of them has unique tasks and varying levels of access to information. How can you ensure effective collaboration, data security, and process control?
To accomplish these tasks, NiceSender provides flexible access settings for your account. This allows you to distribute roles and permissions among your team members. This simplifies joint project management and significantly enhances the security of your data, as each employee only has access to the functionality they need.
Table of Contents
What are flexible access settings in NiceSender, and how do they work?
Flexible access settings allow you to invite other users to your main NiceSender account and assign them individual permissions. This means other team members can work with campaigns, contacts, reports, and other sections within your current plan and using your configured domains and senders.
Important:
Granting account access is not creating a new, separate account for an employee. It's providing permissions to another service user to work within your primary account. Employees do not use their own plan or domain for sending campaigns; they operate under your main account. This ensures centralized management and full control over expenses and branding.
Why grant account access to other users?
This functionality is ideal for:
- Control and security: You grant access only to the sections an employee needs, minimizing the risks of unwanted changes and access to confidential data. Your login and password also remain known only to you.
- Task distribution: Your marketing department can create campaigns, while a designer can focus solely on templates.
How to configure account access in NiceSender: Step-by-step guide
Follow these steps to set up roles and access:
1. Log in to your account: Use the login and password of the NiceSender account owner.
2. Navigate to the “Account” section.
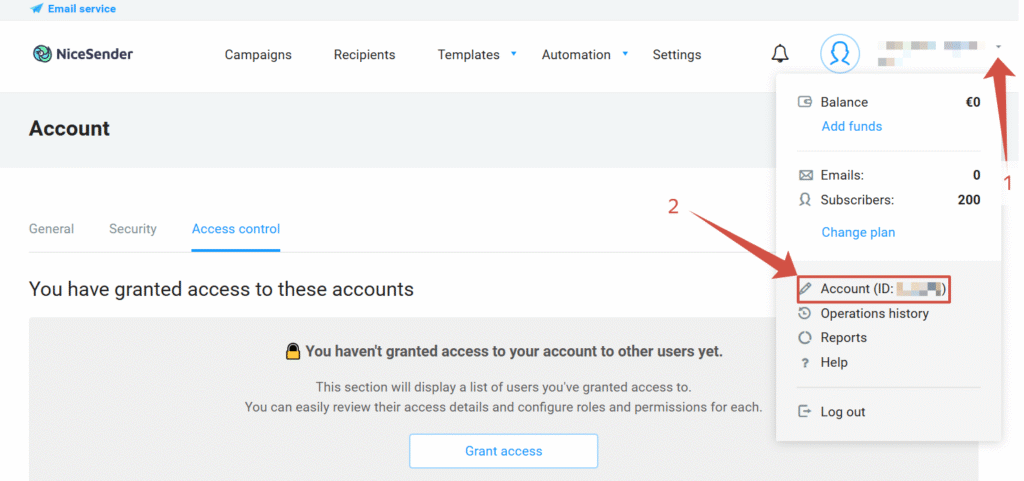
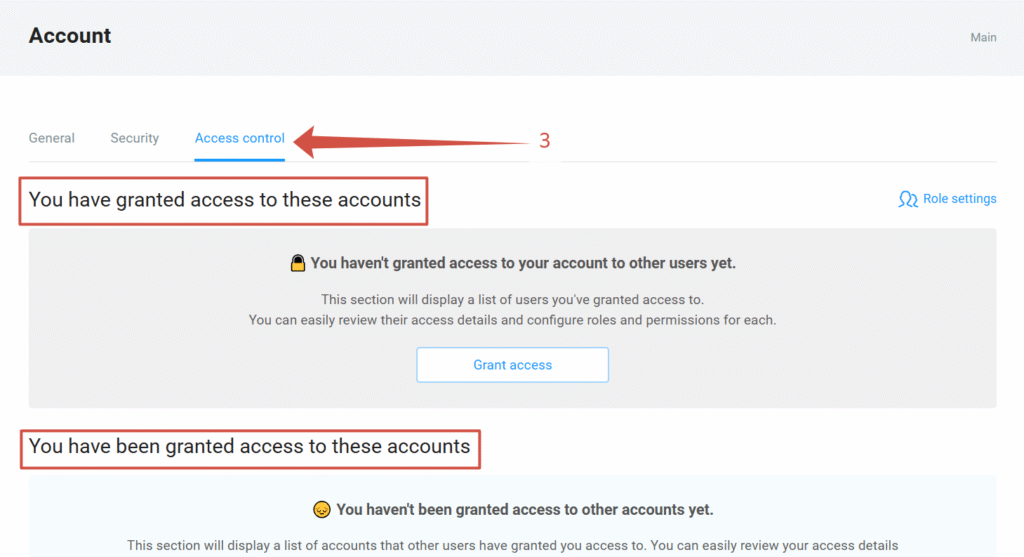
3. Select the “Access control” tab: Here you will see a list of current users with access and can manage them.
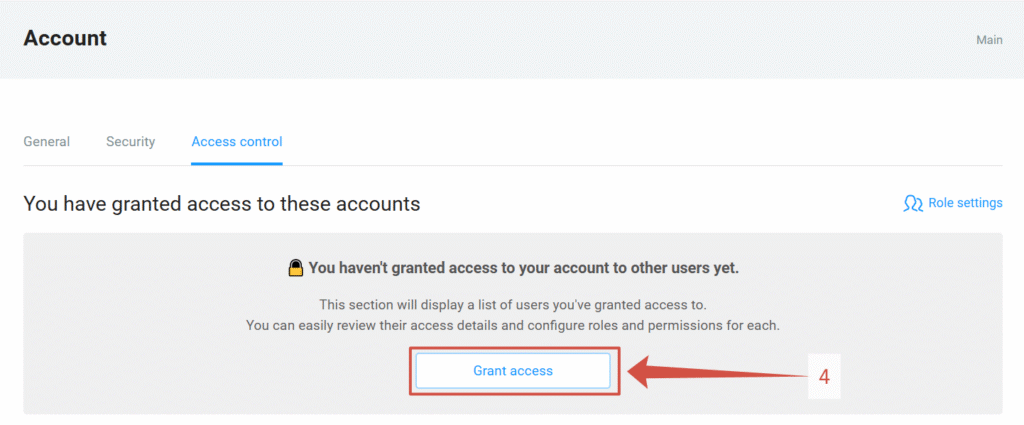
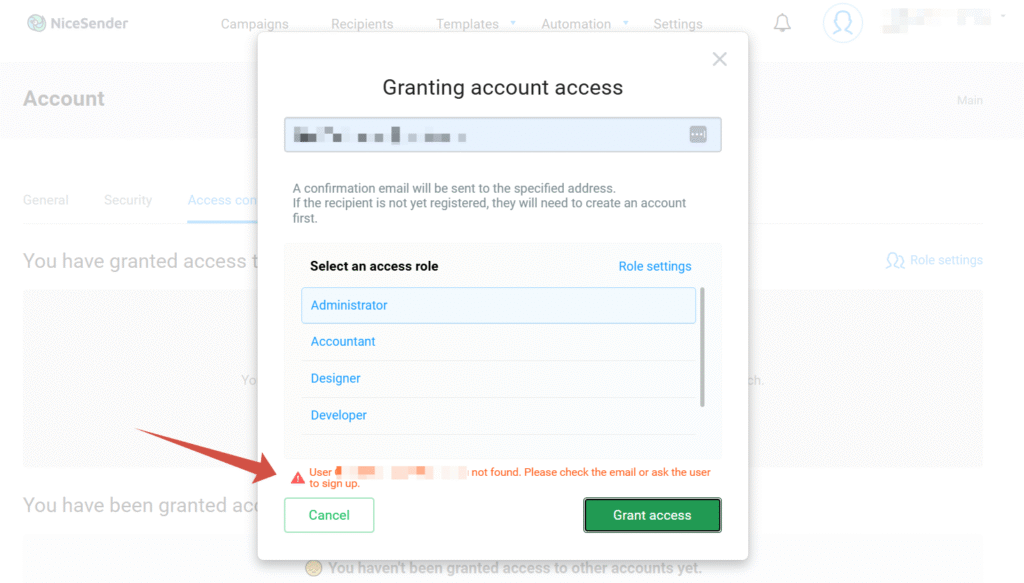
4. Click “Grant access”: A form will open for entering the new user’s details.
5. Enter user details:
- Email: The employee’s email address to which a confirmation email will be sent. If the recipient is not yet registered, they will need to create an account first.
- Role: Choose one of the predefined access roles (Administrator, Accountant, Designer, Developer, Marketing specialist) or click “Role settings” to create your own role.
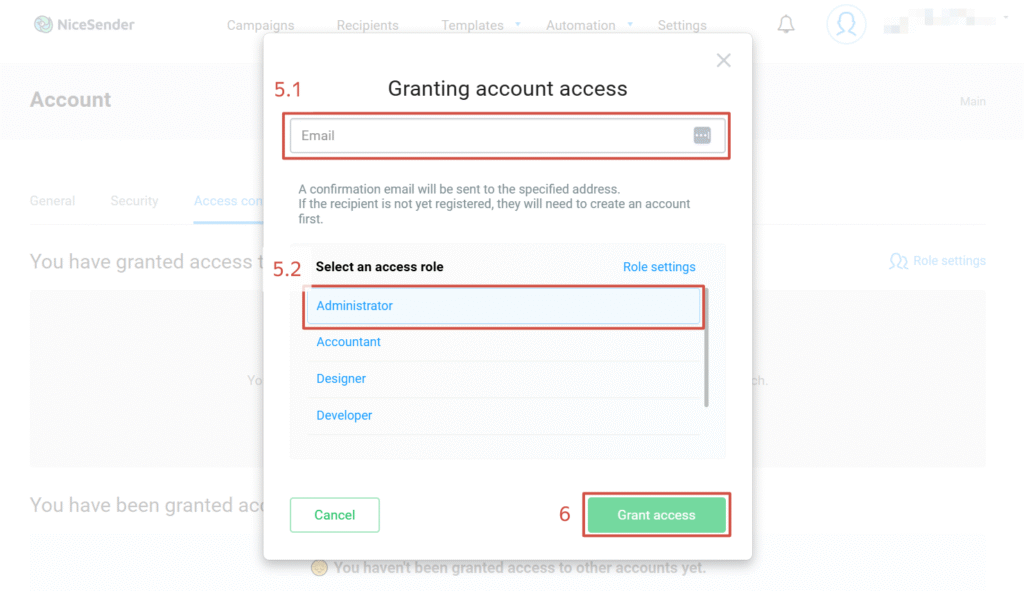
6. Click “Grant access” button: After saving the settings, a confirmation email will be sent to the specified address. If the recipient is not yet registered, they will need to create an account first.
If the recipient is not yet registered, they will need to create an account first.
Access roles in NiceSender: Available functionality
Your account offers five predefined roles with preset permissions: Administrator, Accountant, Designer, Developer, Marketing specialist. You can also “Add new role” for more granular configuration.
Setting up roles using the Administrator example
The “Administrator” role provides maximum access to your NiceSender account.
Important!
Only the account owner has access to configure other users' roles, as well as the "Account" section for password changes and other functions.

You can add any number of administrators to the account. Their access can be left at maximum (by default), or you can configure limitations.
Users with the “Administrator” role have the following permissions:
- Billing and plans: Access to the Billing and plans section, view and manage plans, payments, and invoicing.
- Campaigns: Full access to the Campaigns section, including viewing statistics, creating, editing, and sending email campaigns.
- API and integrations: Manage connections and API keys for integration with other services.
- Recipients: Access to the Recipients section, view and manage recipient lists.
- Reports: Access to the Reports section, view campaign statistics and analytics.
- Settings: Access to the Settings section, manage domains, senders, campaign categories, and organizations.
- Templates: Full access to the Templates section of the dashboard.
- API Templates: Access to the API Templates section, editing, and viewing statistics.
- Webhooks: Access to the Webhooks section, create, view, and edit webhooks.
- Triggers: Access to the Triggers section, setup, editing, and creating new triggers, as well as viewing statistics and recipients.
Example: Assign the “Administrator” role to an employee who oversees all processes and is responsible for the overall functionality of the email campaign system, including sending all types of campaigns and financial matters.
“Marketing specialist” role
The “Marketing specialist” role provides more limited, but sufficient access for most marketing tasks. This role is suitable for employees who are directly involved in creating and sending email campaigns but should not have access to financial or integration settings.
Compared to an “Administrator“, the “Marketing specialist” role does not have access to the following sections:
- Billing and plans: Cannot view or manage payments and plans.
- API and integrations: Cannot manage connections or API keys.
- Webhooks: No access to webhook settings.
Otherwise, a Marketing specialist has full access to creating and sending campaigns, working with recipients, reports, templates, and triggers (including viewing statistics, recipients, and managing triggers).
Example: Assign the “Marketing specialist” role to an email marketing specialist whose primary task is to create and send campaigns, analyze their effectiveness, and work with the subscriber base, but without access to confidential financial data or complex technical integrations.
Customizable roles: Flexible setup for your tasks
If predefined roles don’t fully meet your requirements, you can “Add new role“. This allows you to manually select each necessary permission, granting an employee access only to the functions they truly need.
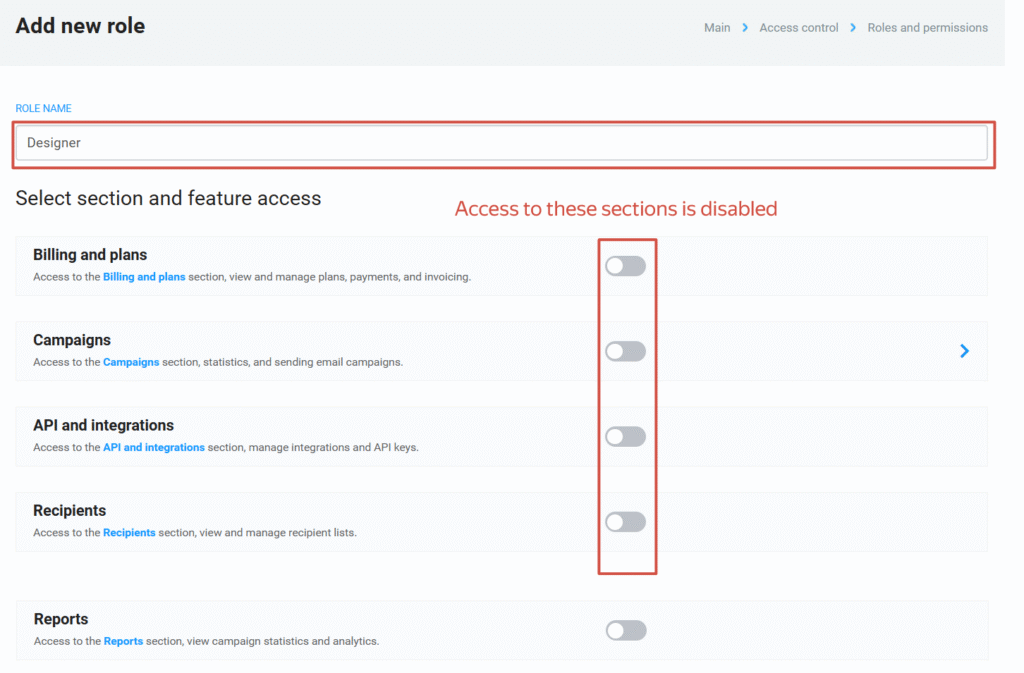
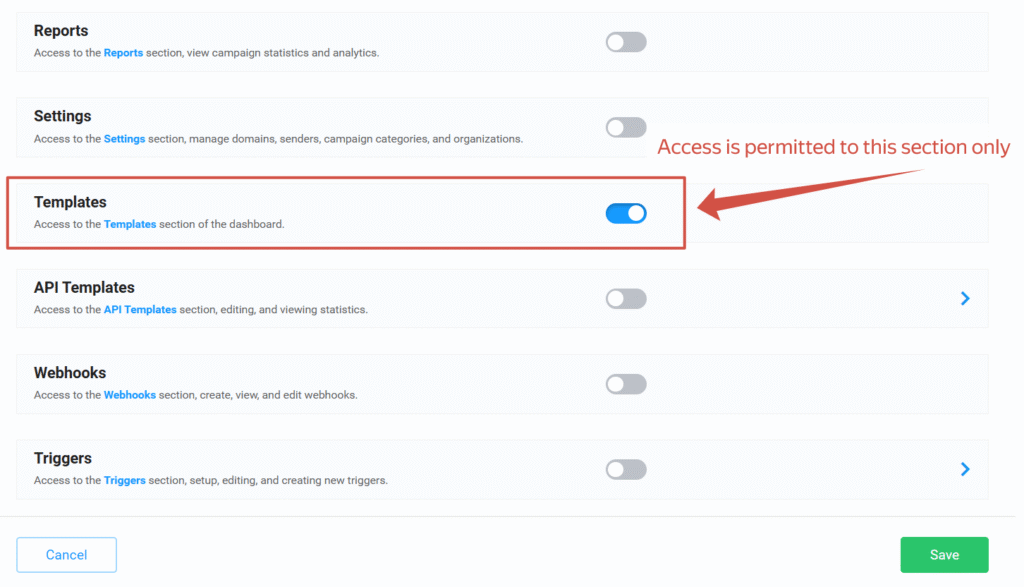
Example of creating a custom role: Suppose you need to grant access to a designer who will only create and edit templates and campaign texts, but won’t be able to send them or manage recipients. You can create a new role and allow only:
“Templates: Access to the Templates section of the dashboard.”
While disabling “Campaigns: Access to the Campaigns section, statistics, and sending email campaigns.” and all other sections.
Managing access to your NiceSender account is not just an additional feature, but a powerful tool for optimizing your work and protecting data. It gives you:
- Full control: You know exactly who has access to what data. This helps prevent errors and unauthorized actions.
- Enhanced data security: By restricting access to confidential information (e.g., payment details and API keys), you significantly reduce the risks of data leakage or misuse. Your subscriber base and financial data remain protected.
- Effective teamwork: Role separation allows each specialist to focus on their tasks. The risk of data deletion or unnecessary changes is also minimized.
- Configuration flexibility: Due to predefined roles and the ability to create your own role, you can configure access permissions for any team structure and any task – from the head of the marketing department to a freelance employee.
Set up flexible account access management in NiceSender now to efficiently distribute your company’s marketing tasks and control audience interaction securely for confidential data.