In this blog post, we’ll explore the NiceSender subscription form builder. Add a form to your website and start collecting new subscribers into recipient groups for your email campaigns.
Table of Contents
How to Create a Subscription Form for Your Website in NiceSender
1. Log in to your NiceSender account or sign up.
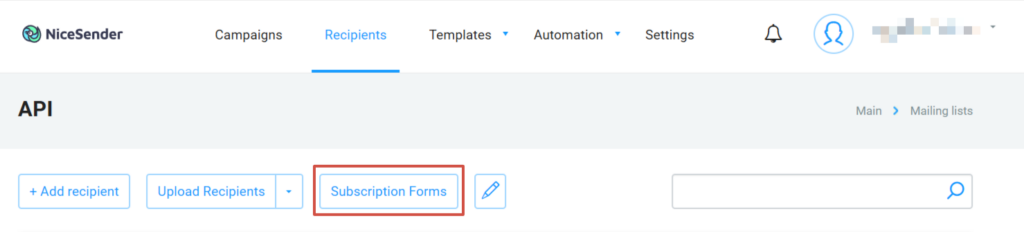
2. Navigate to the “Recipients” tab and select the group where new subscribers will be added, or create a new group:

3. Click the “Subscription Forms” button to enter the interface.
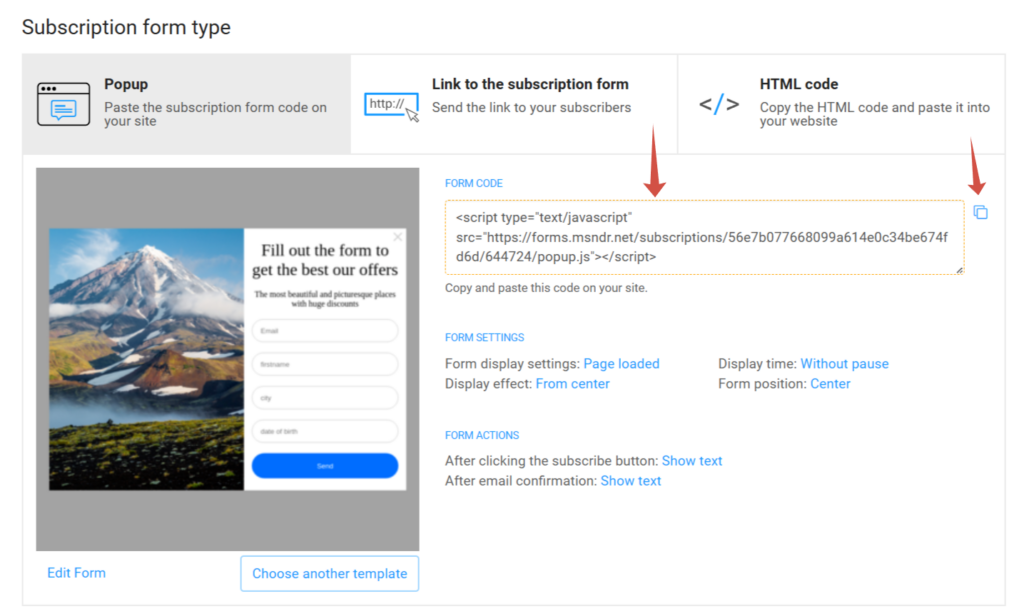
Available Types of NiceSender Subscription Forms
- Popup. A window that appears based on specific user actions. To activate it, simply paste the subscription form code into your website.
- Link to the subscription form. A standalone page hosted by the service. You can send the link to your subscribers directly via messengers or social media.
- HTML code. Copy the unstyled HTML code and paste it into your website for seamless integration.
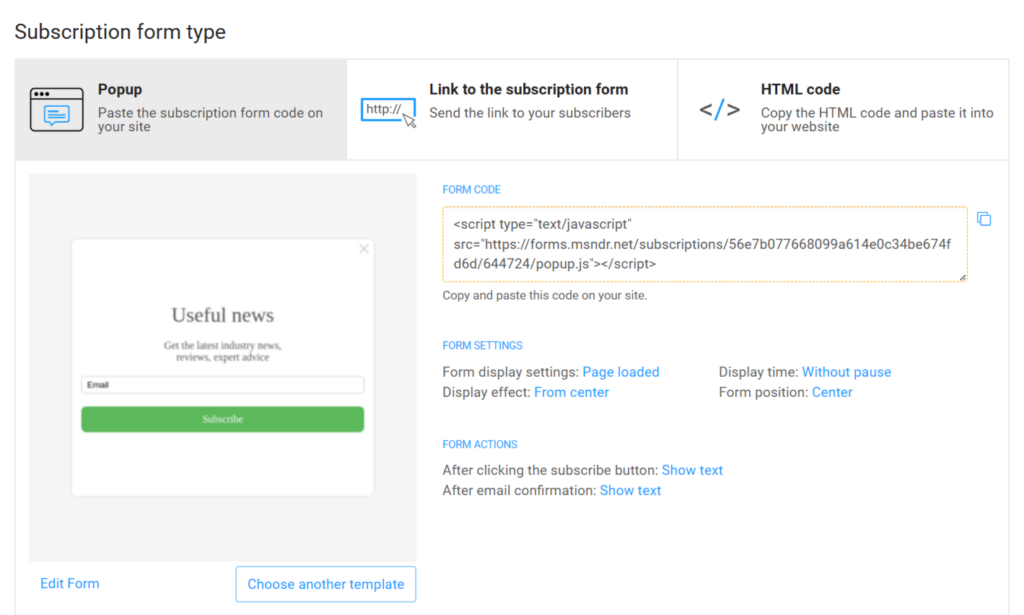
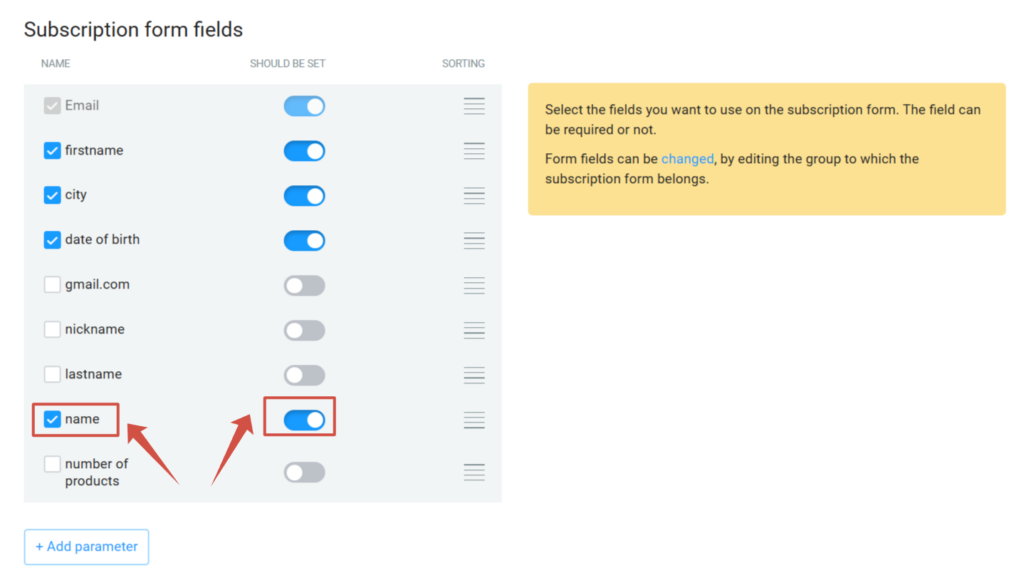
At the bottom of the page, you can add form fields that will be automatically integrated into your form. When filled out, the data is automatically saved to the subscriber profile.
Additionally, you can immediately add consent checkboxes to comply with GDPR and international privacy laws, customize the design, and set up a Double Opt-In (subscription confirmation) email.

Detailed Functionality of the NiceSender Form Builder
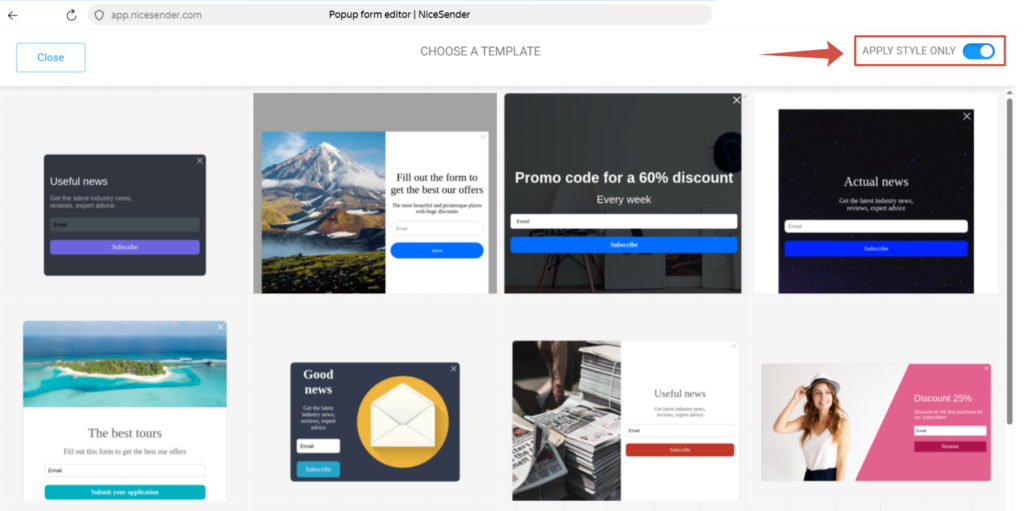
Select “Popup” and click “Edit Form” to customize an existing form, or click “Choose Another Template” to start fresh. We recommend using templates as it makes the process much easier.

If you choose a template, you don’t have to copy the entire design—you can choose to copy only the form styles. To do this, simply enable this feature:
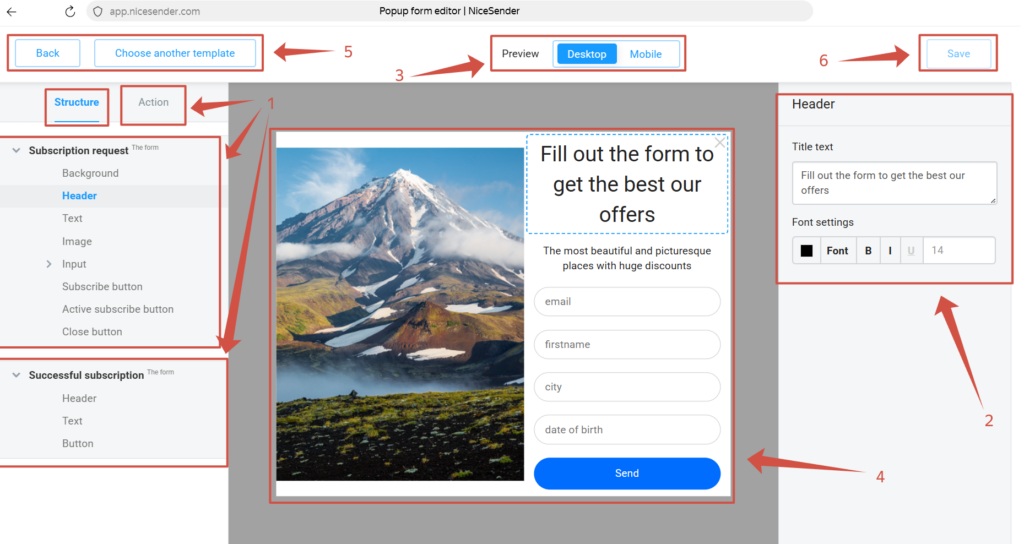
Once in the builder, you will see:
- Main settings menu.
- Selected item settings.
- Desktop and mobile preview.
- Live form display.
- Navigation (back/choose another template).
- The “Save” button to finish editing.
Managing Form Layout and Behavior in the Main Settings
The editor is divided into two primary tabs: Structure (for design and content) and Action (for behavior and post-signup steps).
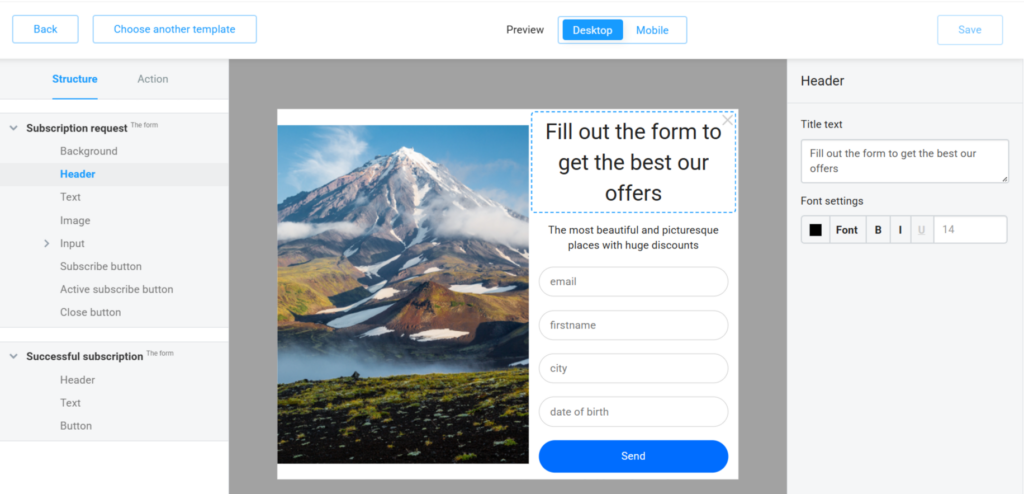
1. Structure (Designing your form)
Under this tab, you can customize the visual elements of the Subscription request:
- Background & Header: Edit the Title text and adjust Font settings (color, size, and style).
- Content: Manage the Text and Image blocks.
- Input & Buttons: Customize the Input fields, the Subscribe button appearance, its Active state, and the Close button.
- Successful subscription: Switch to this section to design the “Thank you” screen, including its Header, Text, and Button.
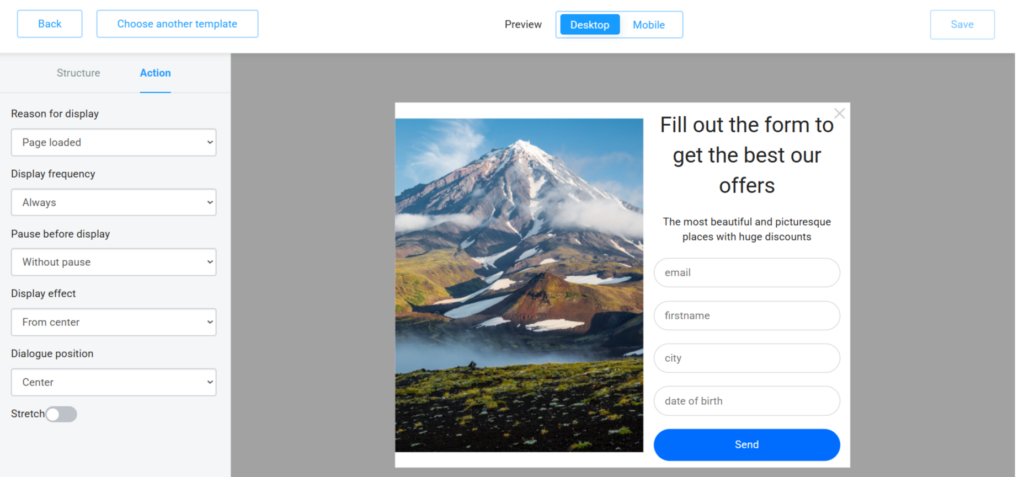
2. Action (Behavior & Triggers)
Switch to the Action tab to define the logic of how and when your form appears to visitors. You can configure:
- Reason for display: Choose the trigger event, such as “Page loaded”.
- Display frequency: Control how often the form is shown to the same user (e.g., “Always”).
- Pause before display: Set a delay before the form pops up, or select “Without pause” for an immediate appearance.
- Display effect: Select the animation style, such as “From center”.
- Dialogue position: Define where on the screen the form will be anchored (e.g., “Center”).
- Stretch: Use the toggle to stretch the form to the full width of the screen.
3. Preview & Save
- Use the Preview toggle at the top to see how your form looks on Desktop vs. Mobile devices.
- Once finished, click the Save button in the top right corner to apply your changes.
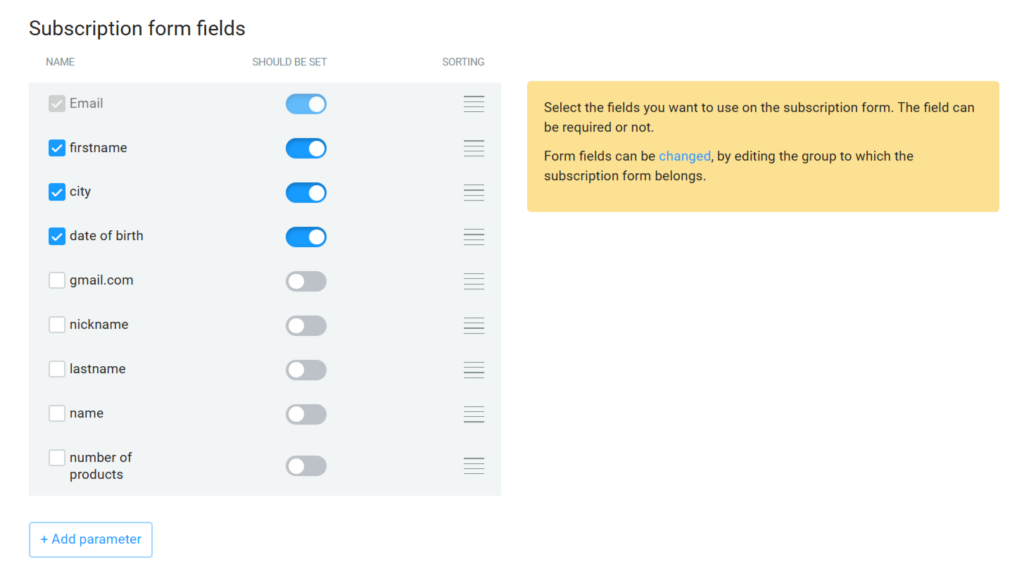
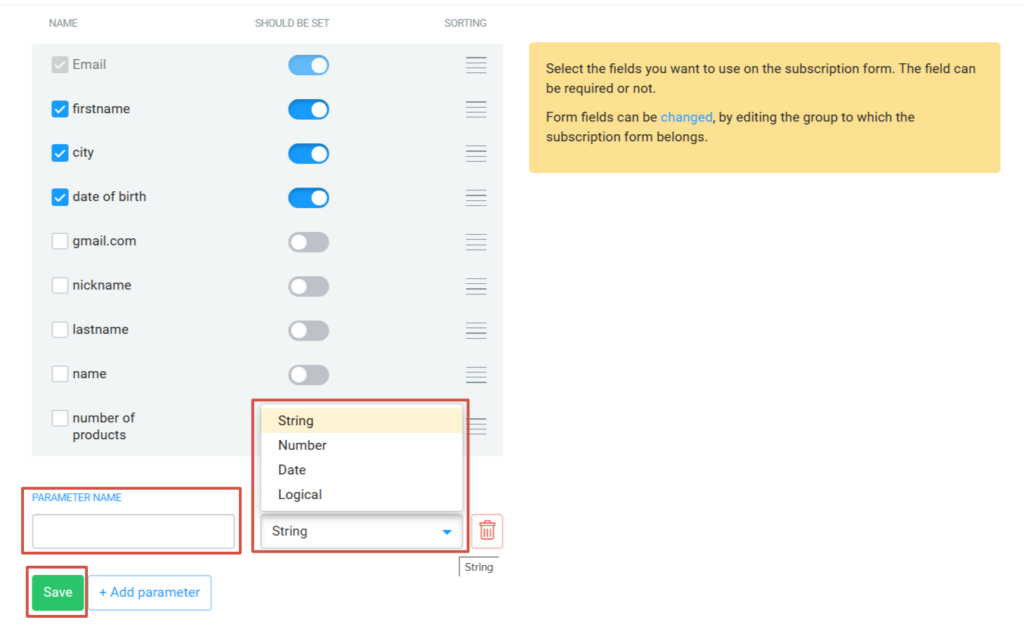
Adding Custom Fields to Collect Subscriber Data
After editing the design, add the necessary fields. Click “+Add parameter”, give it a name, and choose the data type: String, Number, Date, or Logical.
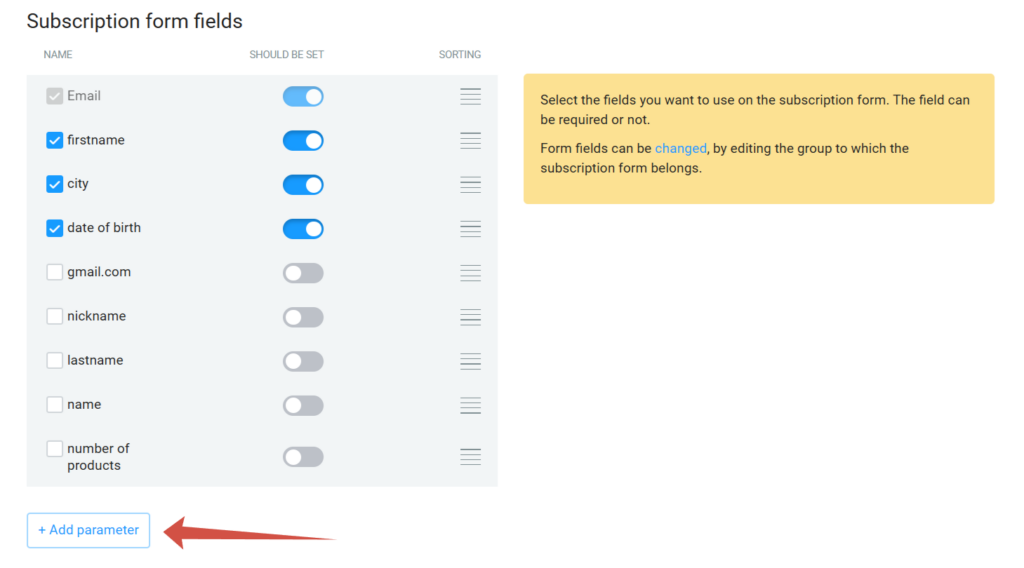
After that, click Save:
Then, activate the fields for your form.
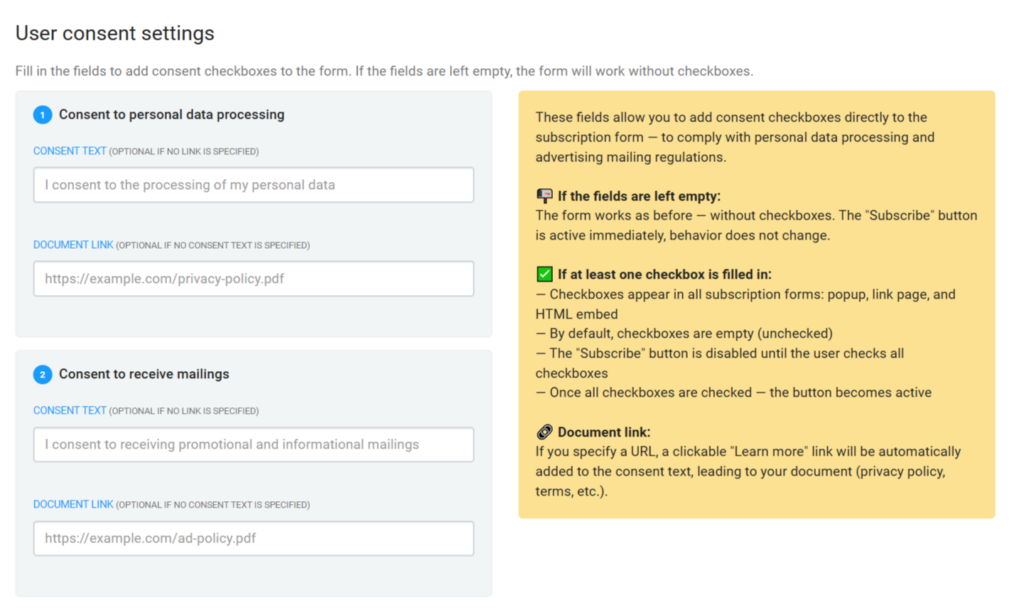
How to Configure User Consent and GDPR Compliance
Checkboxes appear automatically in all form types: popups, link pages, and HTML embeds.
How it looks: The user sees one or two checkboxes before the button:
- ☐ I consent to the processing of my personal data. Learn More →
- ☐ I consent to receiving promotional and informational mailings.
Learn More →
The "Subscribe" button is disabled until all checkboxes are marked.
To set this up, fill in the following fields:
- Consent to personal data processing: Enter the text the user will see and a Document link (URL) to your Privacy Policy.
- Consent to receive mailings: Enter the marketing consent text and a link to your terms.
Important

Text limit: Max 1,024 characters. Link limit: Max 2,048 characters.
The link must start with http:// or https://.
Auto-save. Settings save automatically. The indicator next to the block header shows the status: saving ⟳, saved ✓.
Critical Text and URL Requirements for Legal Compliance
- Both fields are optional: It is enough to fill in either the text or the link in each block.
- If left blank: When both fields in a block are empty, the checkbox is not displayed, and the form works as usual.
- Default text: If you provide only a link without text, the system uses default phrases (“I consent to the processing of my personal data” / “I consent to receiving promotional and informational mailings”).
Previewing Consent Checkboxes Across Different Form Types
In the popup editor, checkboxes are shown in the preview between the input fields and the button.
| Form Type | Checkboxes | Button Locking |
|---|---|---|
| Popup | ✅ | ✅ JS |
| Link Page | ✅ | ✅ JS |
| HTML Form | ✅ | — (No JS) |
JS stands for JavaScript. In popups and link pages, the button is locked automatically. In HTML forms, there is no automatic blocking so you can implement it yourself if needed.
How to Embed the Ready Subscription Form into Your Website
To publish the form, simply copy the Form code and paste it into your website. If you need assistance, our technical support is always here to help.
Create unique email subscription forms, grow your audience effectively, and launch high-quality campaigns with NiceSender!